Tutorials / Section-wise menu: AC, non-AC and rooftop prices
Section-wise menu: AC, non-AC and rooftop prices
Section-wise menu lets one restaurant charge different prices in different areas: the AC hall, the non-AC hall, the rooftop, the garden. You keep one menu. Each table belongs to a section, and the bill uses that section’s prices. It is on Economy, Premium and Enterprise, for one restaurant, a centralised food court or hotel, or each outlet of a Multi-Outlet chain (each outlet sets up its own sections). It is not available with Token only. There is nothing to switch on: open Settings → Tables & sections. Until you add a section, nothing changes for your restaurant.
1. Add your sections
Open Settings › Tables & sections and pick the Sections tab. Press + Add section.
- Name: what staff and guests see, for example AC Hall.
- Prices: Same as the menu price, or Menu price + a percentage, rounded up to ₹1, ₹5, ₹10 or more. The example under it shows what ₹180 becomes. Half and Full get the same rule.
- Categories not sold here: tick any category this section doesn’t sell, such as the bar in the family hall.
Press Save section. Add your other sections the same way. A section at the plain menu price, such as Non-AC, is fine too: it lets you see it separately on reports.
2. Put tables in sections
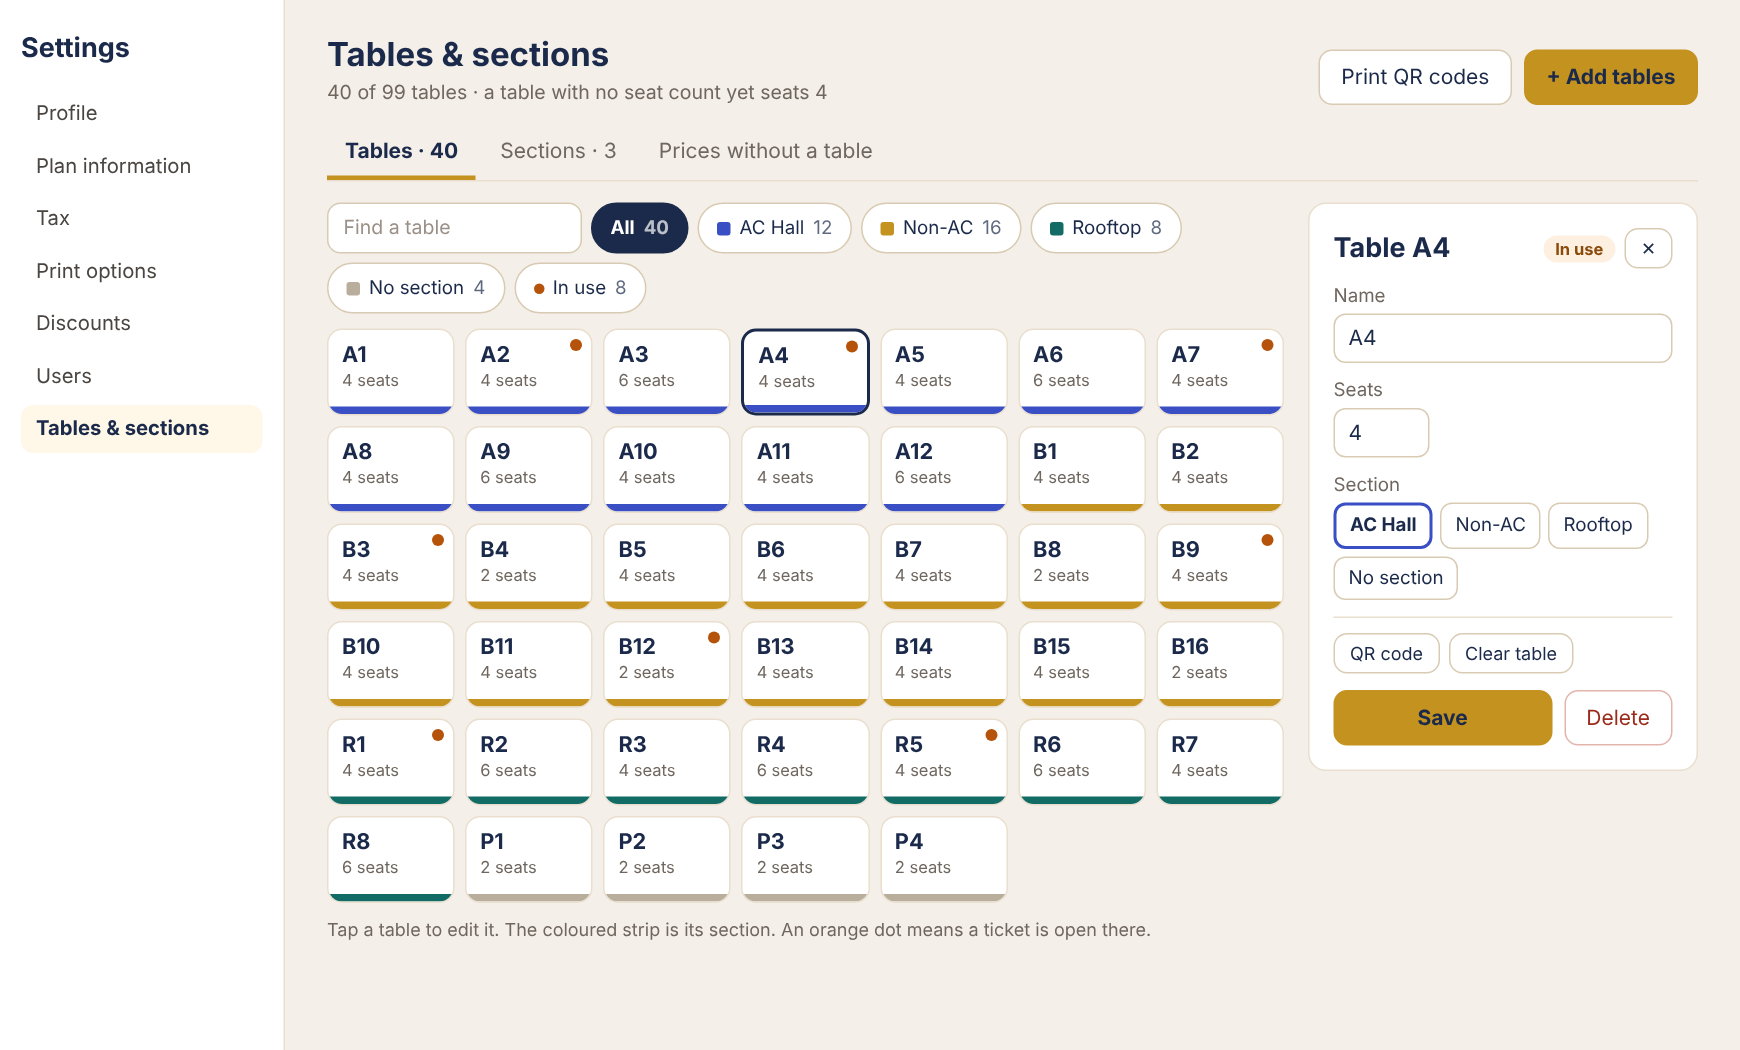
Pick the Tables tab. Tap a table, choose its section in the panel, and press Save. The coloured strip on each tile shows its section, and the buttons above the tables show one section at a time.
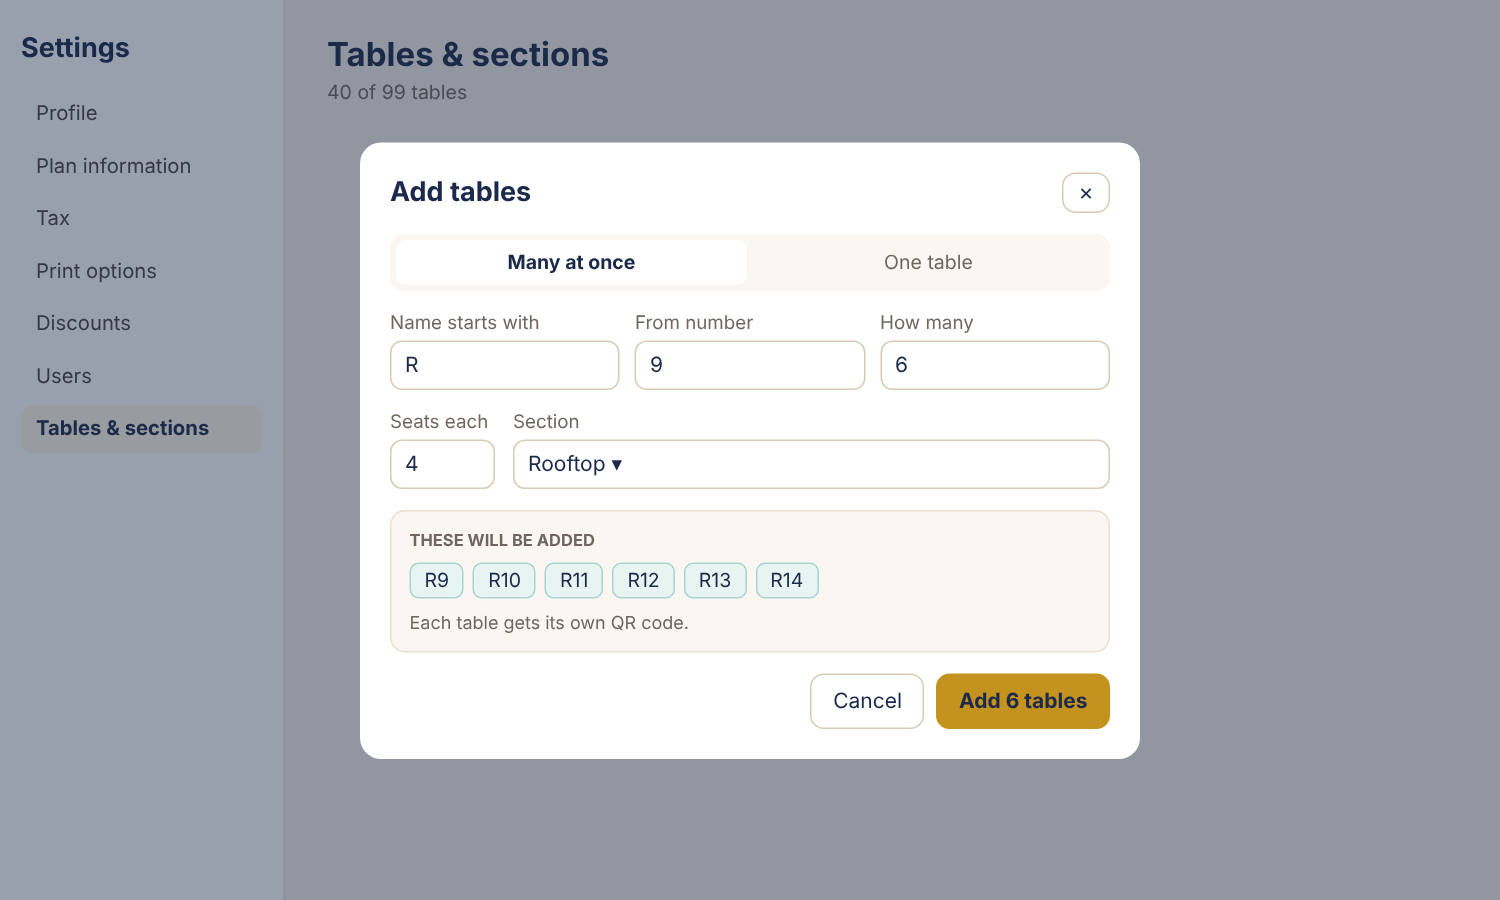
Adding a new floor? Press + Add tables, choose Many at once, and fill in Name starts with (R), From number (1), How many (8), Seats each and Section. Check the list under These will be added and press Add 8 tables.
A table with no section bills at the menu price.
3. Prices for orders without a table
Pick the Prices without a table tab. For Dine-in without a table, Takeaway, Delivery, Direct Orders (online) and Kiosk, choose Menu price or a section. Dishes not sold in that section aren’t sold for those orders either.
4. Set dishes by hand where needed
Open Menu and press Prices by section. Each dish has a row, and dishes with sizes get a row per size. Grey prices follow the section’s rule. To set one by hand, type the price and press Enter. It turns bold. Press rule beside it to go back to the rule. A price below the menu price is marked Below menu price.
Untick sold to stop a dish in one section. Use Only dishes changed by hand to check your changes.
Many dishes at once? Export Excel on Menu adds a column per section, such as section: AC Hall. Leave a cell blank to follow the rule, or write 260, Half=200; Full=330, or not sold, then upload the file again. A blank cell clears a price set by hand.
5. Service charge by section
Open Settings › Tax. Under Service charge by section, each section is Same as above, Own rate (with GST on it), or No service charge.
6. Billing on POS
On POS, pick the table. The label next to POS / DINE-IN shows whose prices are on screen, for example AC Hall prices (auto). Dishes not sold there are greyed out. Change the table and the cart reprices. The section buttons above the tables help on a big floor.
If the guest should be billed in another section, open the label and pick it. That change is logged.
The bill and the KOT print the section after the table: Table A4 · AC Hall. Guests who scan the table’s own QR code see that section’s prices.
7. When guests move
On Tickets, change an open ticket’s Table to a table in another section and the ticket takes the new prices. Split and merge do the same. To keep a guest on other prices, use Prices on the ticket. If a dish on the ticket isn’t sold in the new section, the move stops and tells you which dish to remove first.
8. Reports
On Reports, Sales by section shows orders, item value and sales for each section. Pick a Section at the top to see the whole report, item-wise and category-wise sales included, for that section only. Section changes that changed the bill lists every move, split, merge and cashier pick that changed a total, with who made it.
Why restaurants use it: Section-wise menu and the blog post.